Connection guide
Connect ChatGPT to your vault
ChatGPT can use the credentials in one of your projects — looking things up, pulling reports, working in your tools — without ever seeing a password.
- About five minutes
- Requires ChatGPT Plus, Pro or Business
- Free accounts can't add custom connectors
Last verified: August 2026, against ChatGPT as it is today.
ChatGPT never receives your credentials. It asks the vault to perform an action, the vault performs it using the stored credential, and only the result comes back. The key never leaves. Every request is written to your Access log.
The steps
Turn on Developer mode in ChatGPT
Open Settings → Plugins → Developer mode and switch it on. This is the setting that allows any custom connector to be added, so ChatGPT gates it deliberately.
The warning is worth reading rather than clicking past. Developer mode doesn't trust the vault in particular — it lets you add any address you like, so you are the one choosing to trust one specific address. Add the one below and nothing else.
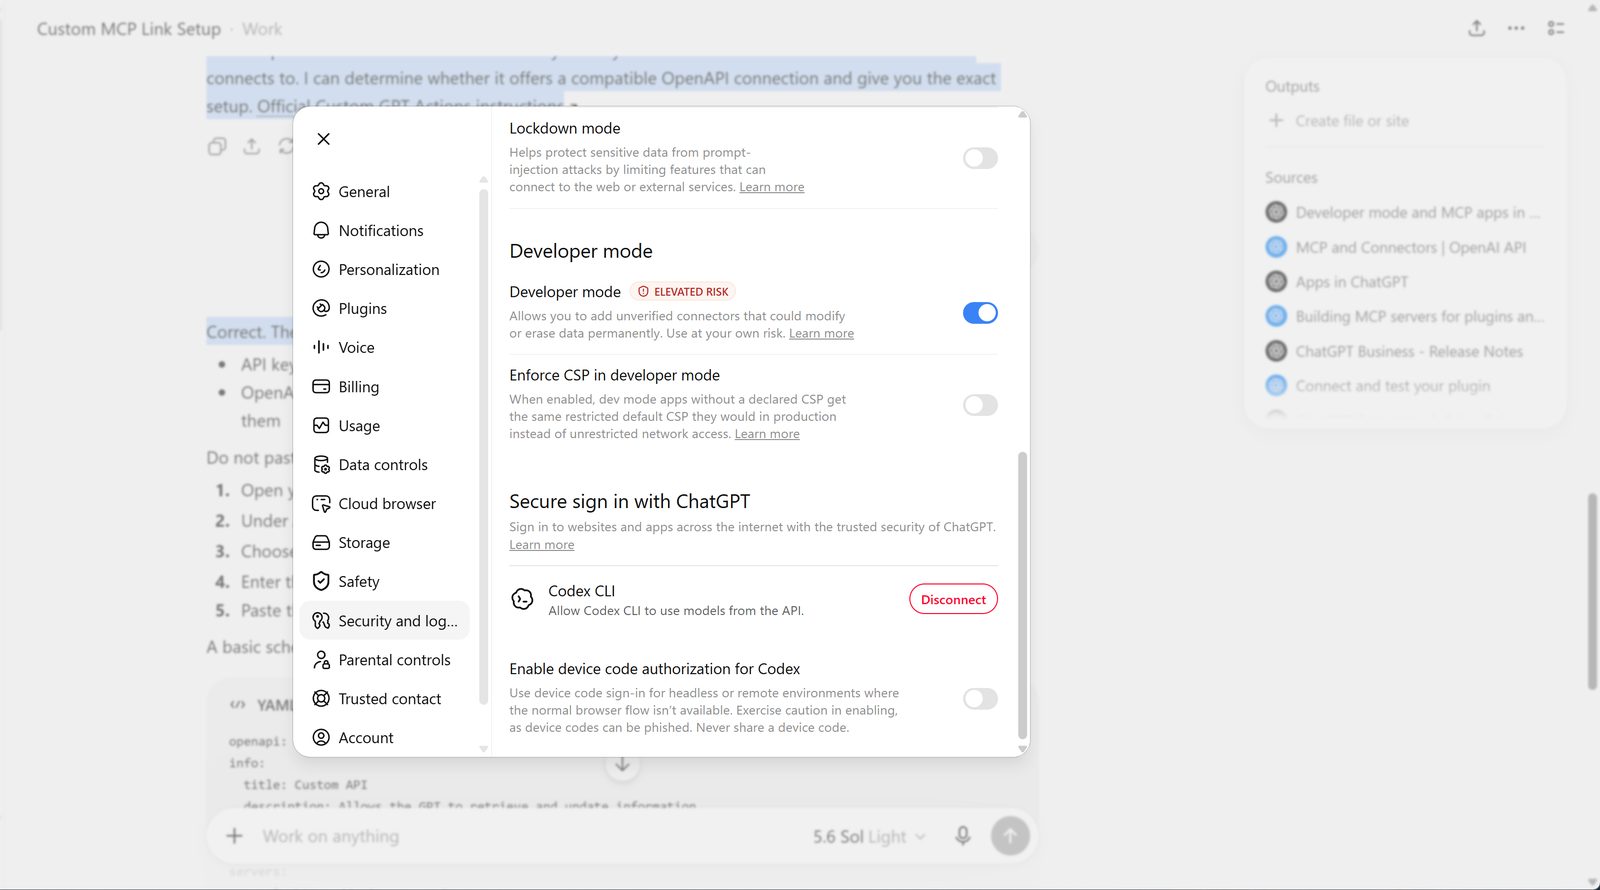
Developer mode, switched on. ChatGPT labels it 'Elevated risk' — that warning is about custom connectors generally. Copy your project's address from the vault
Open the project in your vault, go to the AI connections tab, and copy the endpoint. Every project has its own address, which is what lets you connect several projects to the same ChatGPT account.
https://yourvault.cloud/api/public/mcp/<your-project-id>
Copy it rather than type it. One wrong character reports as "not found", which is a confusing way to discover a typo.
Add a new plugin
Back on the Plugins screen, add a new plugin. Name it after the project — you will probably add a second one later, and the name is the only thing telling them apart. Description can stay empty; the vault sends its own when it connects.
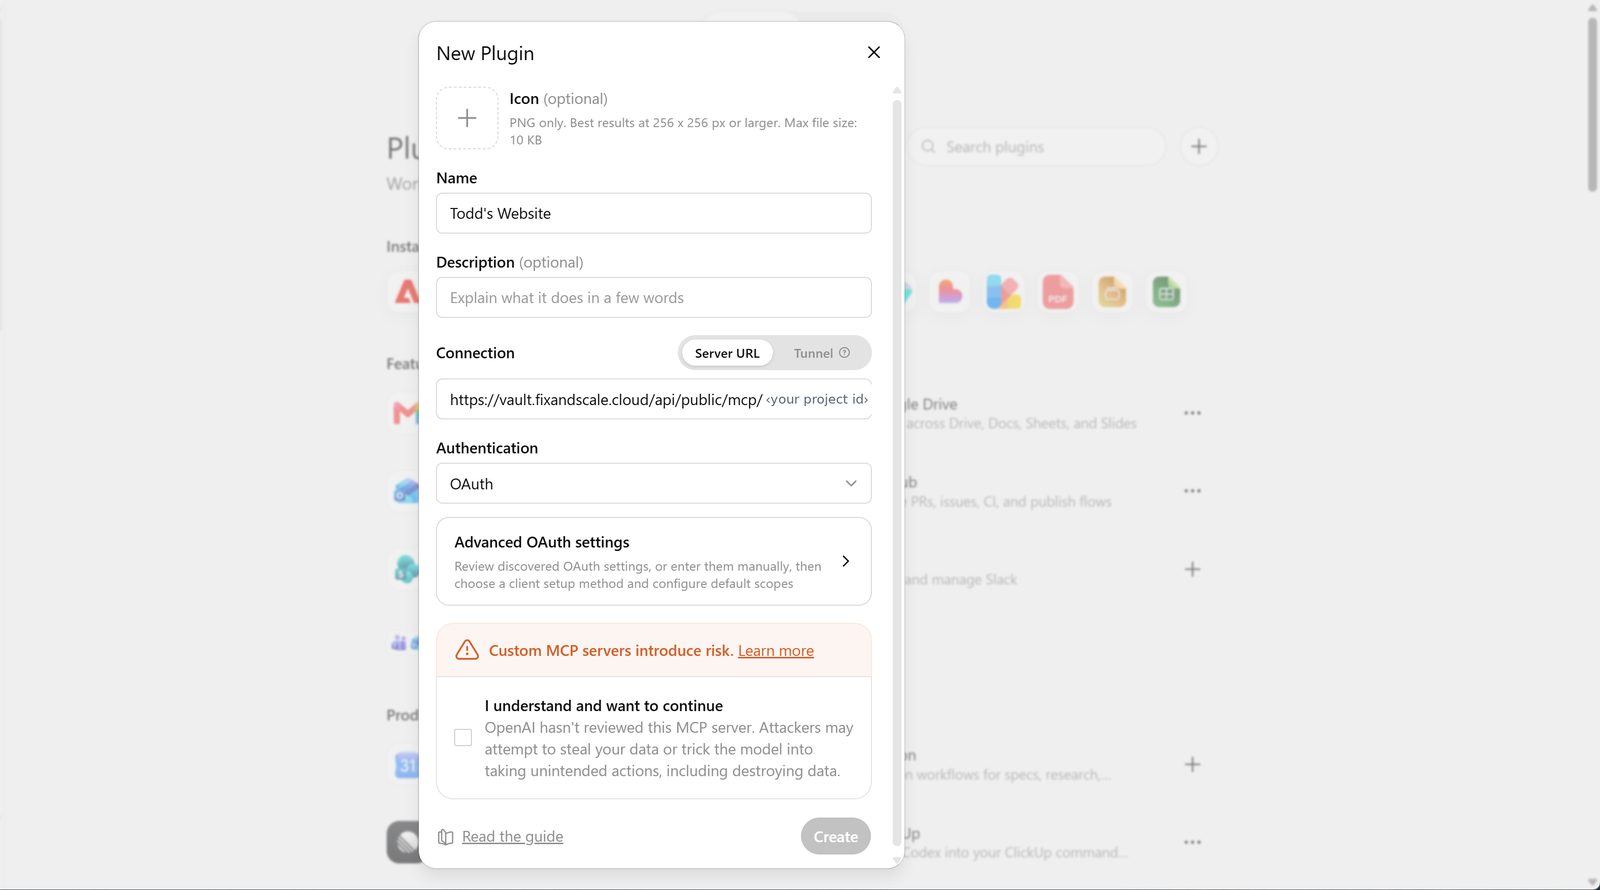
Paste the address
Under Connection, keep the connection type on Server URL and paste the endpoint you copied.
Not Tunnel — that's for developers running a server on their own machine.
Set Authentication to OAuth
Choose OAuth and leave "Advanced OAuth settings" alone. There is nothing for you to fill in: the vault publishes what ChatGPT needs and registers automatically, which is why there is no client id or secret to copy anywhere.
Never paste a token into the plugin's name, description or instructions
Those fields are visible to anyone the plugin is shared with. This connection doesn't need a token at all — OAuth is the whole point of this step.
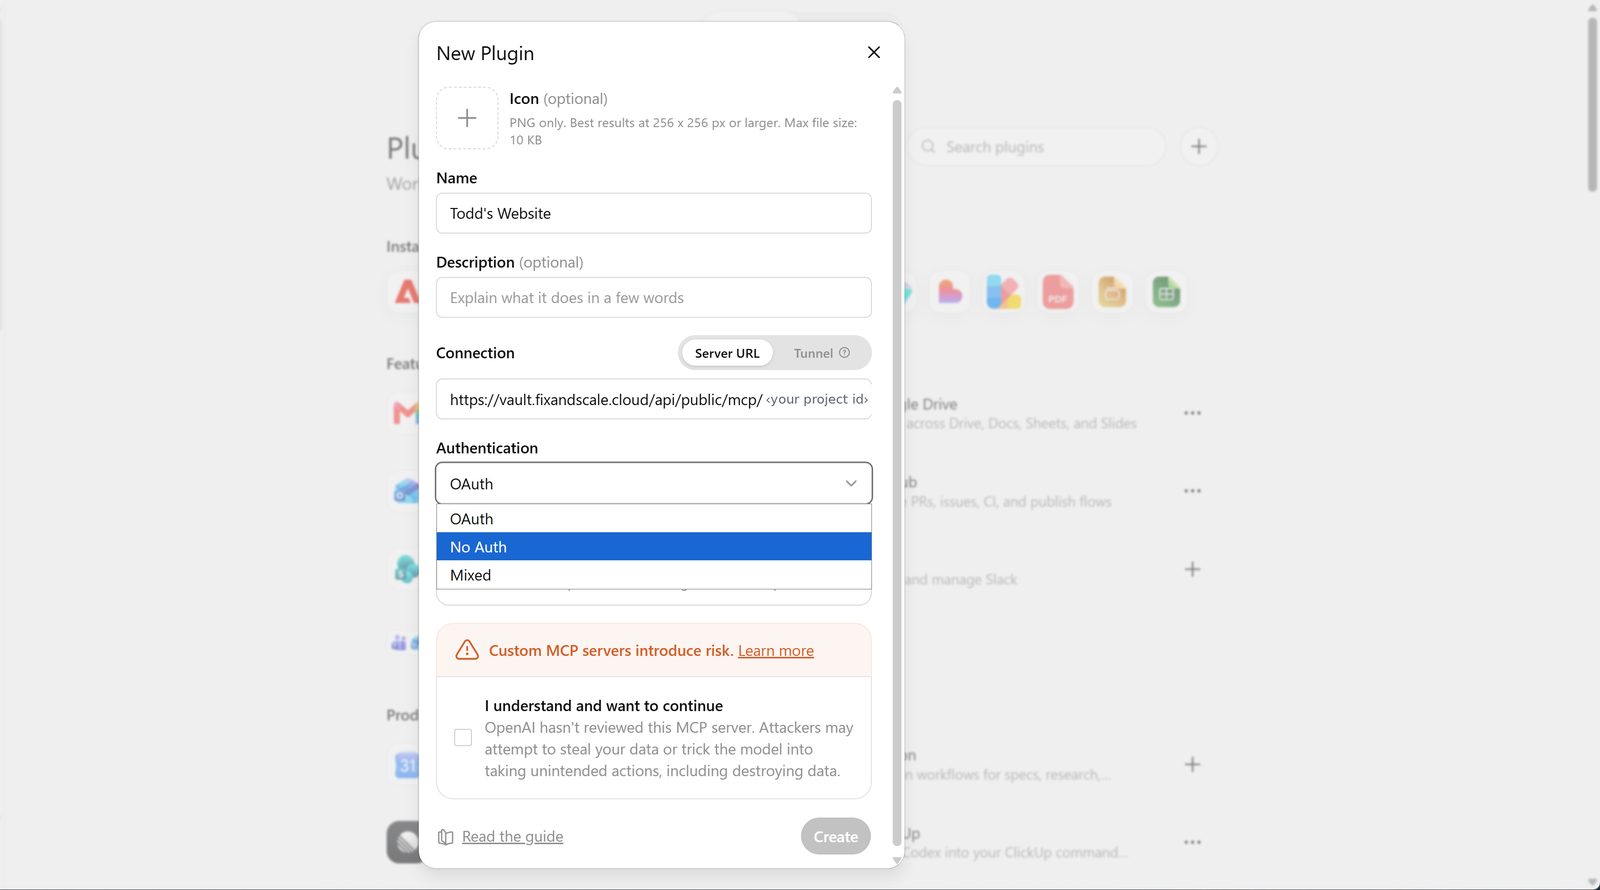
Choose OAuth — not No Auth, not Mixed. Tick the risk box, then Create
Tick "I understand and want to continue", then Create. Create stays greyed out until the box is ticked.
The plugin now exists but isn't connected to anything yet.
Connect and approve
Click Connect, then "Sign in with [plugin name]". That opens the vault, where you sign in and choose which project this connection may reach.
The project you pick here is the only project this connection can ever see. Picking a different project later means a new connection, not a change to this one.
Check the account name shown on the vault's screen before approving. Anyone with more than one login will eventually approve from the wrong one.
If the project says "AI access off", the connection is still created — you just need to switch AI access on in the project before ChatGPT can use it.
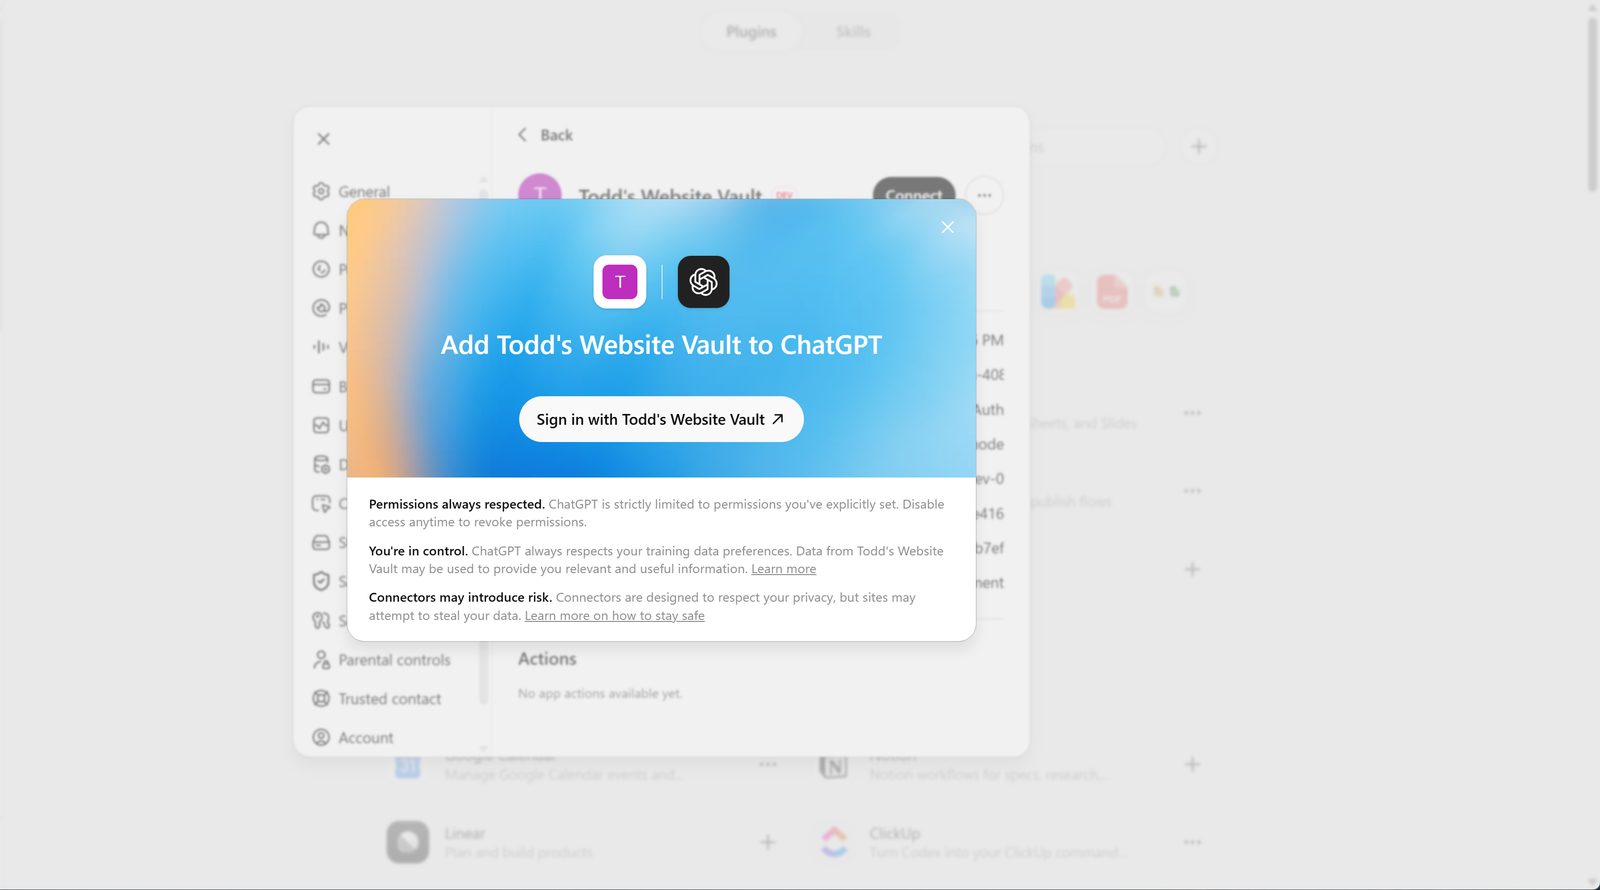
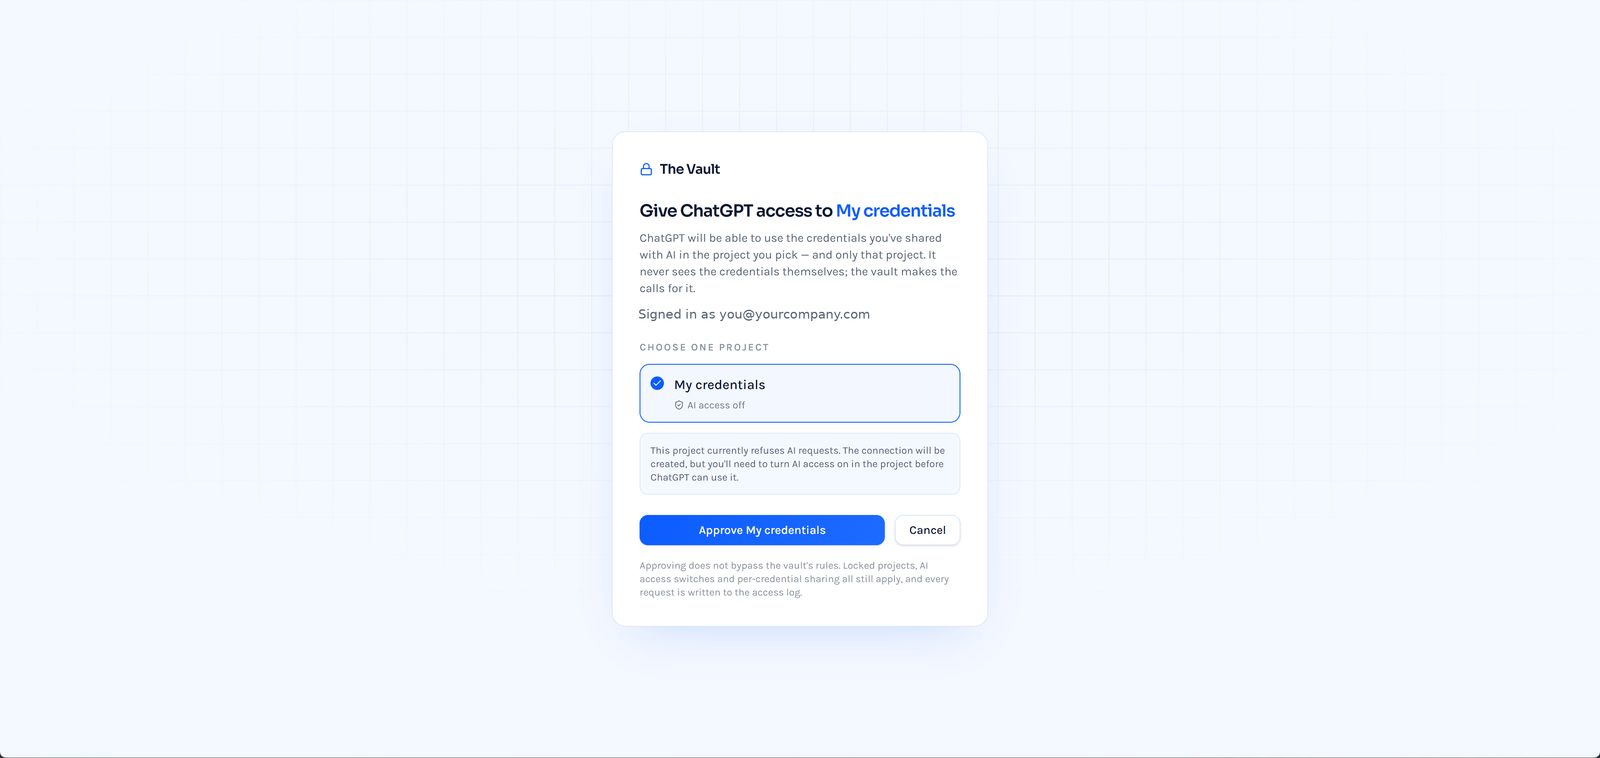
The vault's own approval screen — pick the one project this connection may reach. Set the permission level
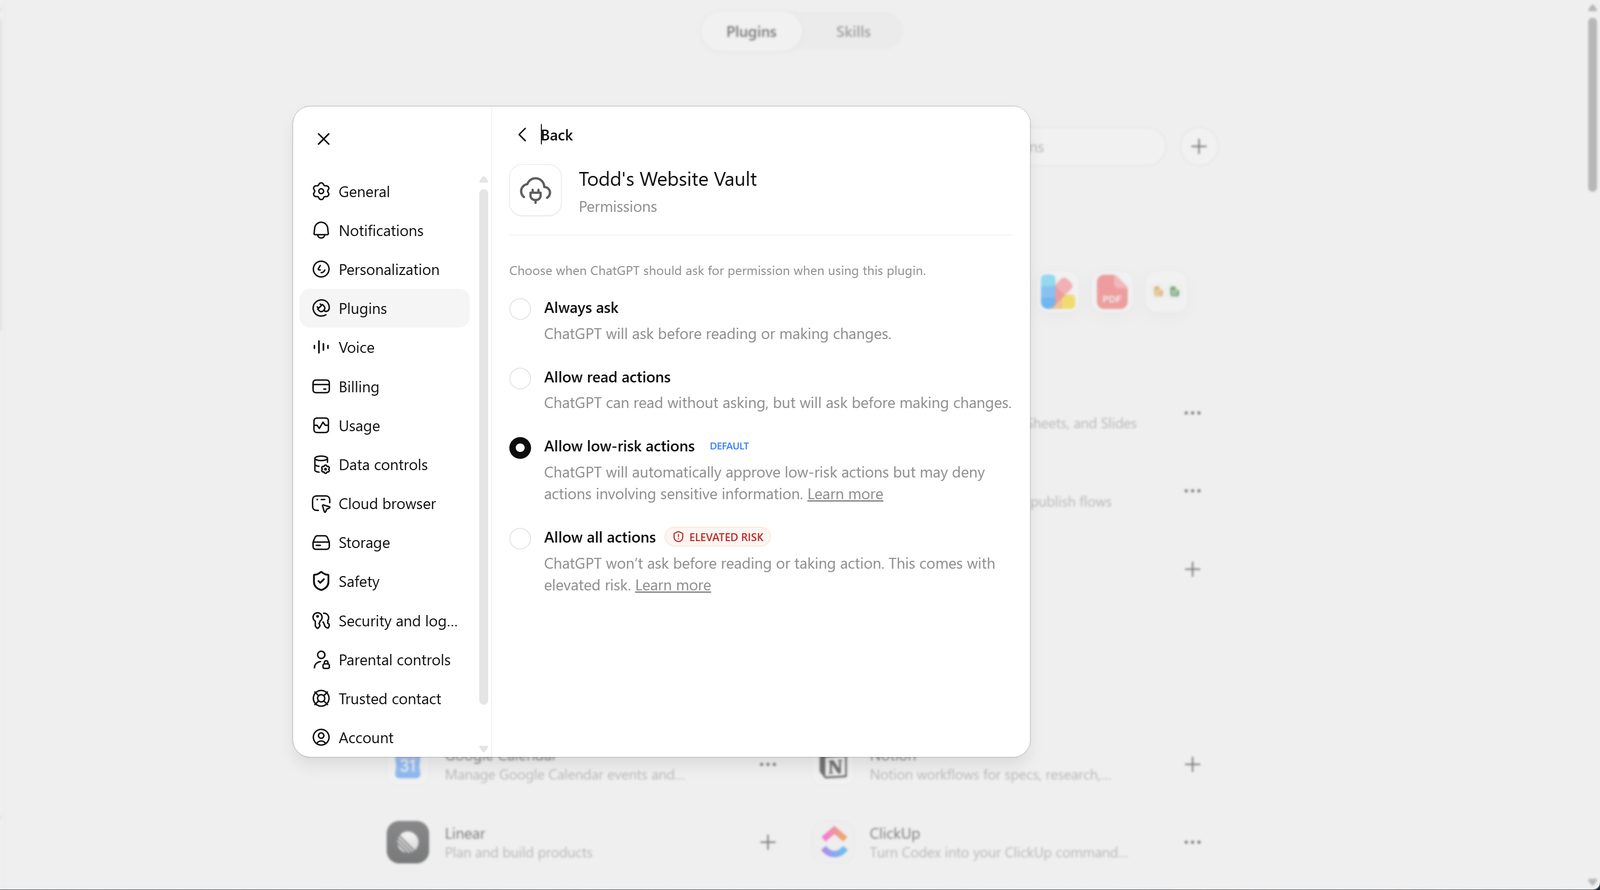
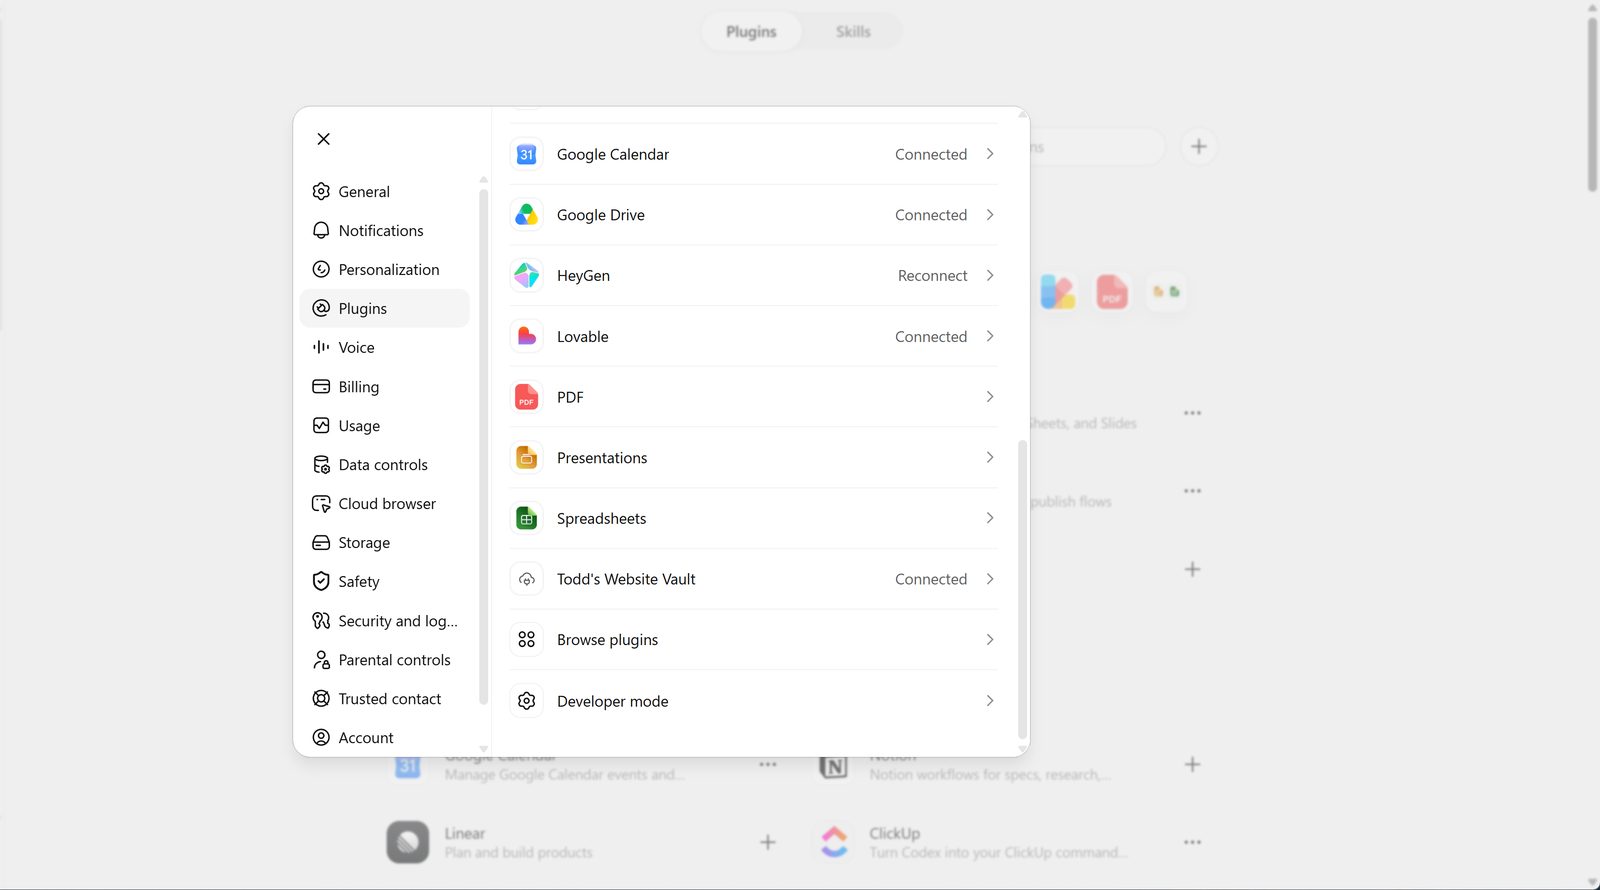
Open the plugin's Permissions and choose "Allow read actions". The table below explains why that one, and why ChatGPT's own default is the awkward choice here.
Which permission level to choose
ChatGPT asks how much it may do without checking with you first.
| Level | Verdict | Why |
|---|---|---|
| Always ask | Safe but tedious | ChatGPT asks before every request, including plain lookups. Reads can't change anything, so most of those questions earn nothing. |
| Allow read actions | Recommended | ChatGPT reads freely and asks before anything that changes something — the same line the vault draws. |
| Allow low-risk actionsChatGPT default | ChatGPT's default | ChatGPT decides what counts as low-risk, and its judgement won't match the vault's tiers. |
| Allow all actions | No — not with credentials | It takes you out of write operations entirely, which is exactly the decision you kept for yourself by putting the credentials in a vault. |
Read actions makes ChatGPT's rule match the vault's own read/write split, so both layers agree instead of overlapping in ways you can't predict.
"Low-risk" is the harder one. Adding a tag to a contact probably reads as low-risk to ChatGPT; here it counts as a change, and it is the kind of change you want to see before it happens.
Testing it worked
Name the plugin explicitly in your first message. Otherwise you're testing whether ChatGPT decided to use it, not whether the connection works — and a silent non-answer looks identical to a broken setup.
- Using [plugin name], list the credentials in the project.
- Using [plugin name], look up the last five contacts in my CRM.
The first should come back with names, services and expiry dates — and no secret values, because none exist to return. The second proves a real call reached the service. Then open the project's Access log: both requests should be there, with the connection that made them.
Turning it off
Revoke the connection in the project's AI connections list. That ends access immediately, whatever ChatGPT still shows on its side.
Removing the plugin inside ChatGPT tidies its interface but does not revoke access. Revoke in the vault first, then delete the plugin if you want it gone from the list.
Troubleshooting
- "Not found"
- The project id in the address is wrong or was truncated when it was pasted. Copy the endpoint again from the AI connections tab and compare it character for character.
- It connects, but there are no tools
- AI access is switched off for the project, or no credential in it has been shared with AI. Both live on the project — the connection itself is fine.
- A tool refuses
- That capability is switched off on the credential. Open the credential and check which actions are enabled; the refusal names what it needed.